Example Asbestos Removal Projects in Everett

Each example tells one asbestos job from start to finish: the building, the samples and what they showed, how the work is set up, how many days it takes and roughly what it costs. About half of Everett homes were built before 1980, many of them before 1940, so each example starts with a lab test.

These are examples, not past jobs, clients or addresses. Each is set in the kind of house Everett actually has, and the cost shown sits inside the matching price line above.

Cement shingles off one wall to check the wood siding underneath

Example project
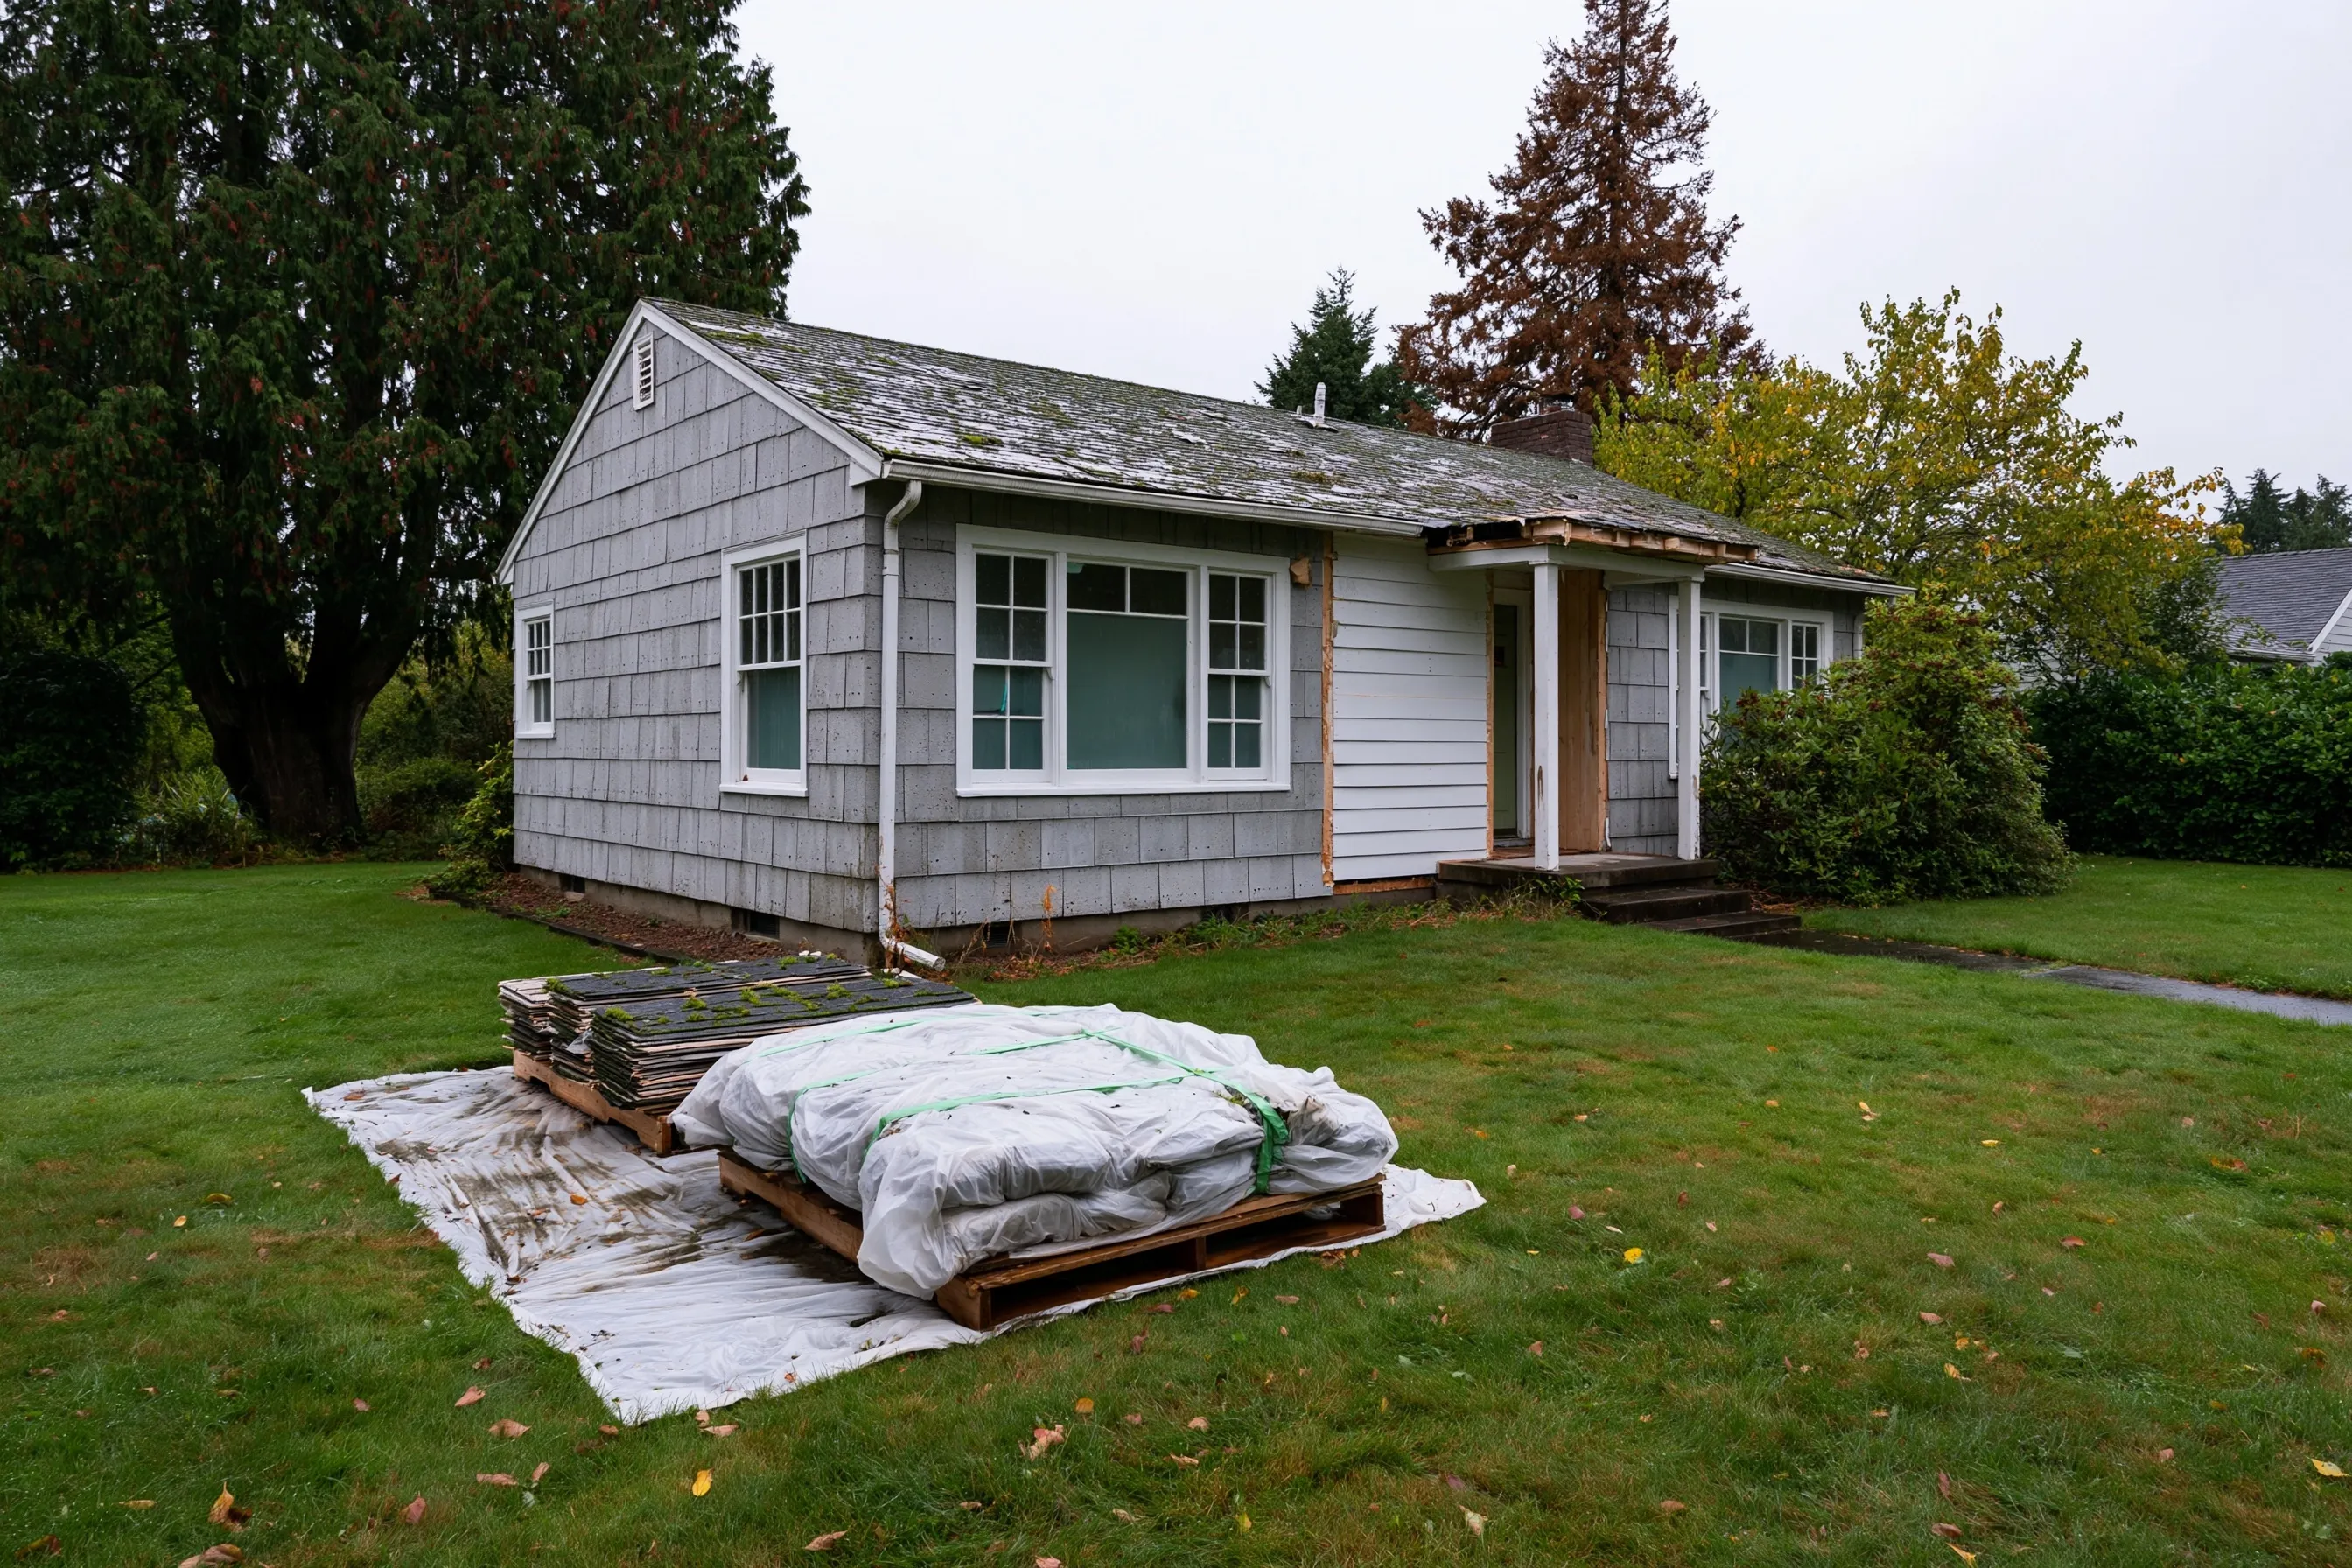
Small 1940s house in gray cement shingles with the shingles off around the front porch, painted wood lap siding showing underneath and the removed shingles wrapped on the lawn
Home
1940s one-story house in Everett
Original request
Find out whether the original wood siding under the cement shingles is worth saving
Testing
The cracked shingle that first showed the wood goes to the lab: positive
Area
About 260 sq ft, the front wall around the porch
Agency notice
Clean air agency filing for that one wall
Timeline
Two days, then a pause while the owners look at the wood
Estimated cost
$4,200

Scope of work

Plastic along the wall and on the ground, the shingles wetted and lifted off whole with the nails pulled so the wood is not split, wrapped and hauled, and the ground picked clean. Mending the boards, painting them and stripping the other three walls would be priced later.

Project overview

In this example, the owners of a 1940s house in Everett can see painted wood lap siding where a cement shingle has broken off. Before they commit to stripping the whole house, they want one wall opened to see what shape the wood is in. A shingle tests positive.

With the filing in, the crew wets and lifts the shingles on the front wall, pulling each nail by hand so no board underneath splits. The owners and their painter then look at the bare wood and decide what to do with the other three walls.

The goal

The goal is one bare wall that shows the condition of the old wood, so the owners can decide on the rest of the house.

Process

  1. Before work Shingle sample to the lab; notice filed; the wall picked with the painter.
  2. Day one Ground sheeted, the front wall misted, the highest row unnailed first.
  3. Day two Last courses off, nail holes left for the painter, stacks wrapped and hauled.
  4. Then The painter checks the wood, and the owners choose the plan for the other walls.

Planning right

  • One wall tells you a lot about the rest, but not everything. Weather sides often have more rot.
  • Do not pry shingles off to peek underneath. Ask for a sample to be cut instead.
  • Ask the crew to pull nails rather than pry, if the wood is to be kept.
  • If the wood is kept, the painter may need a few dry days before priming.

Get a free quoteMore about asbestos siding and roofing removal
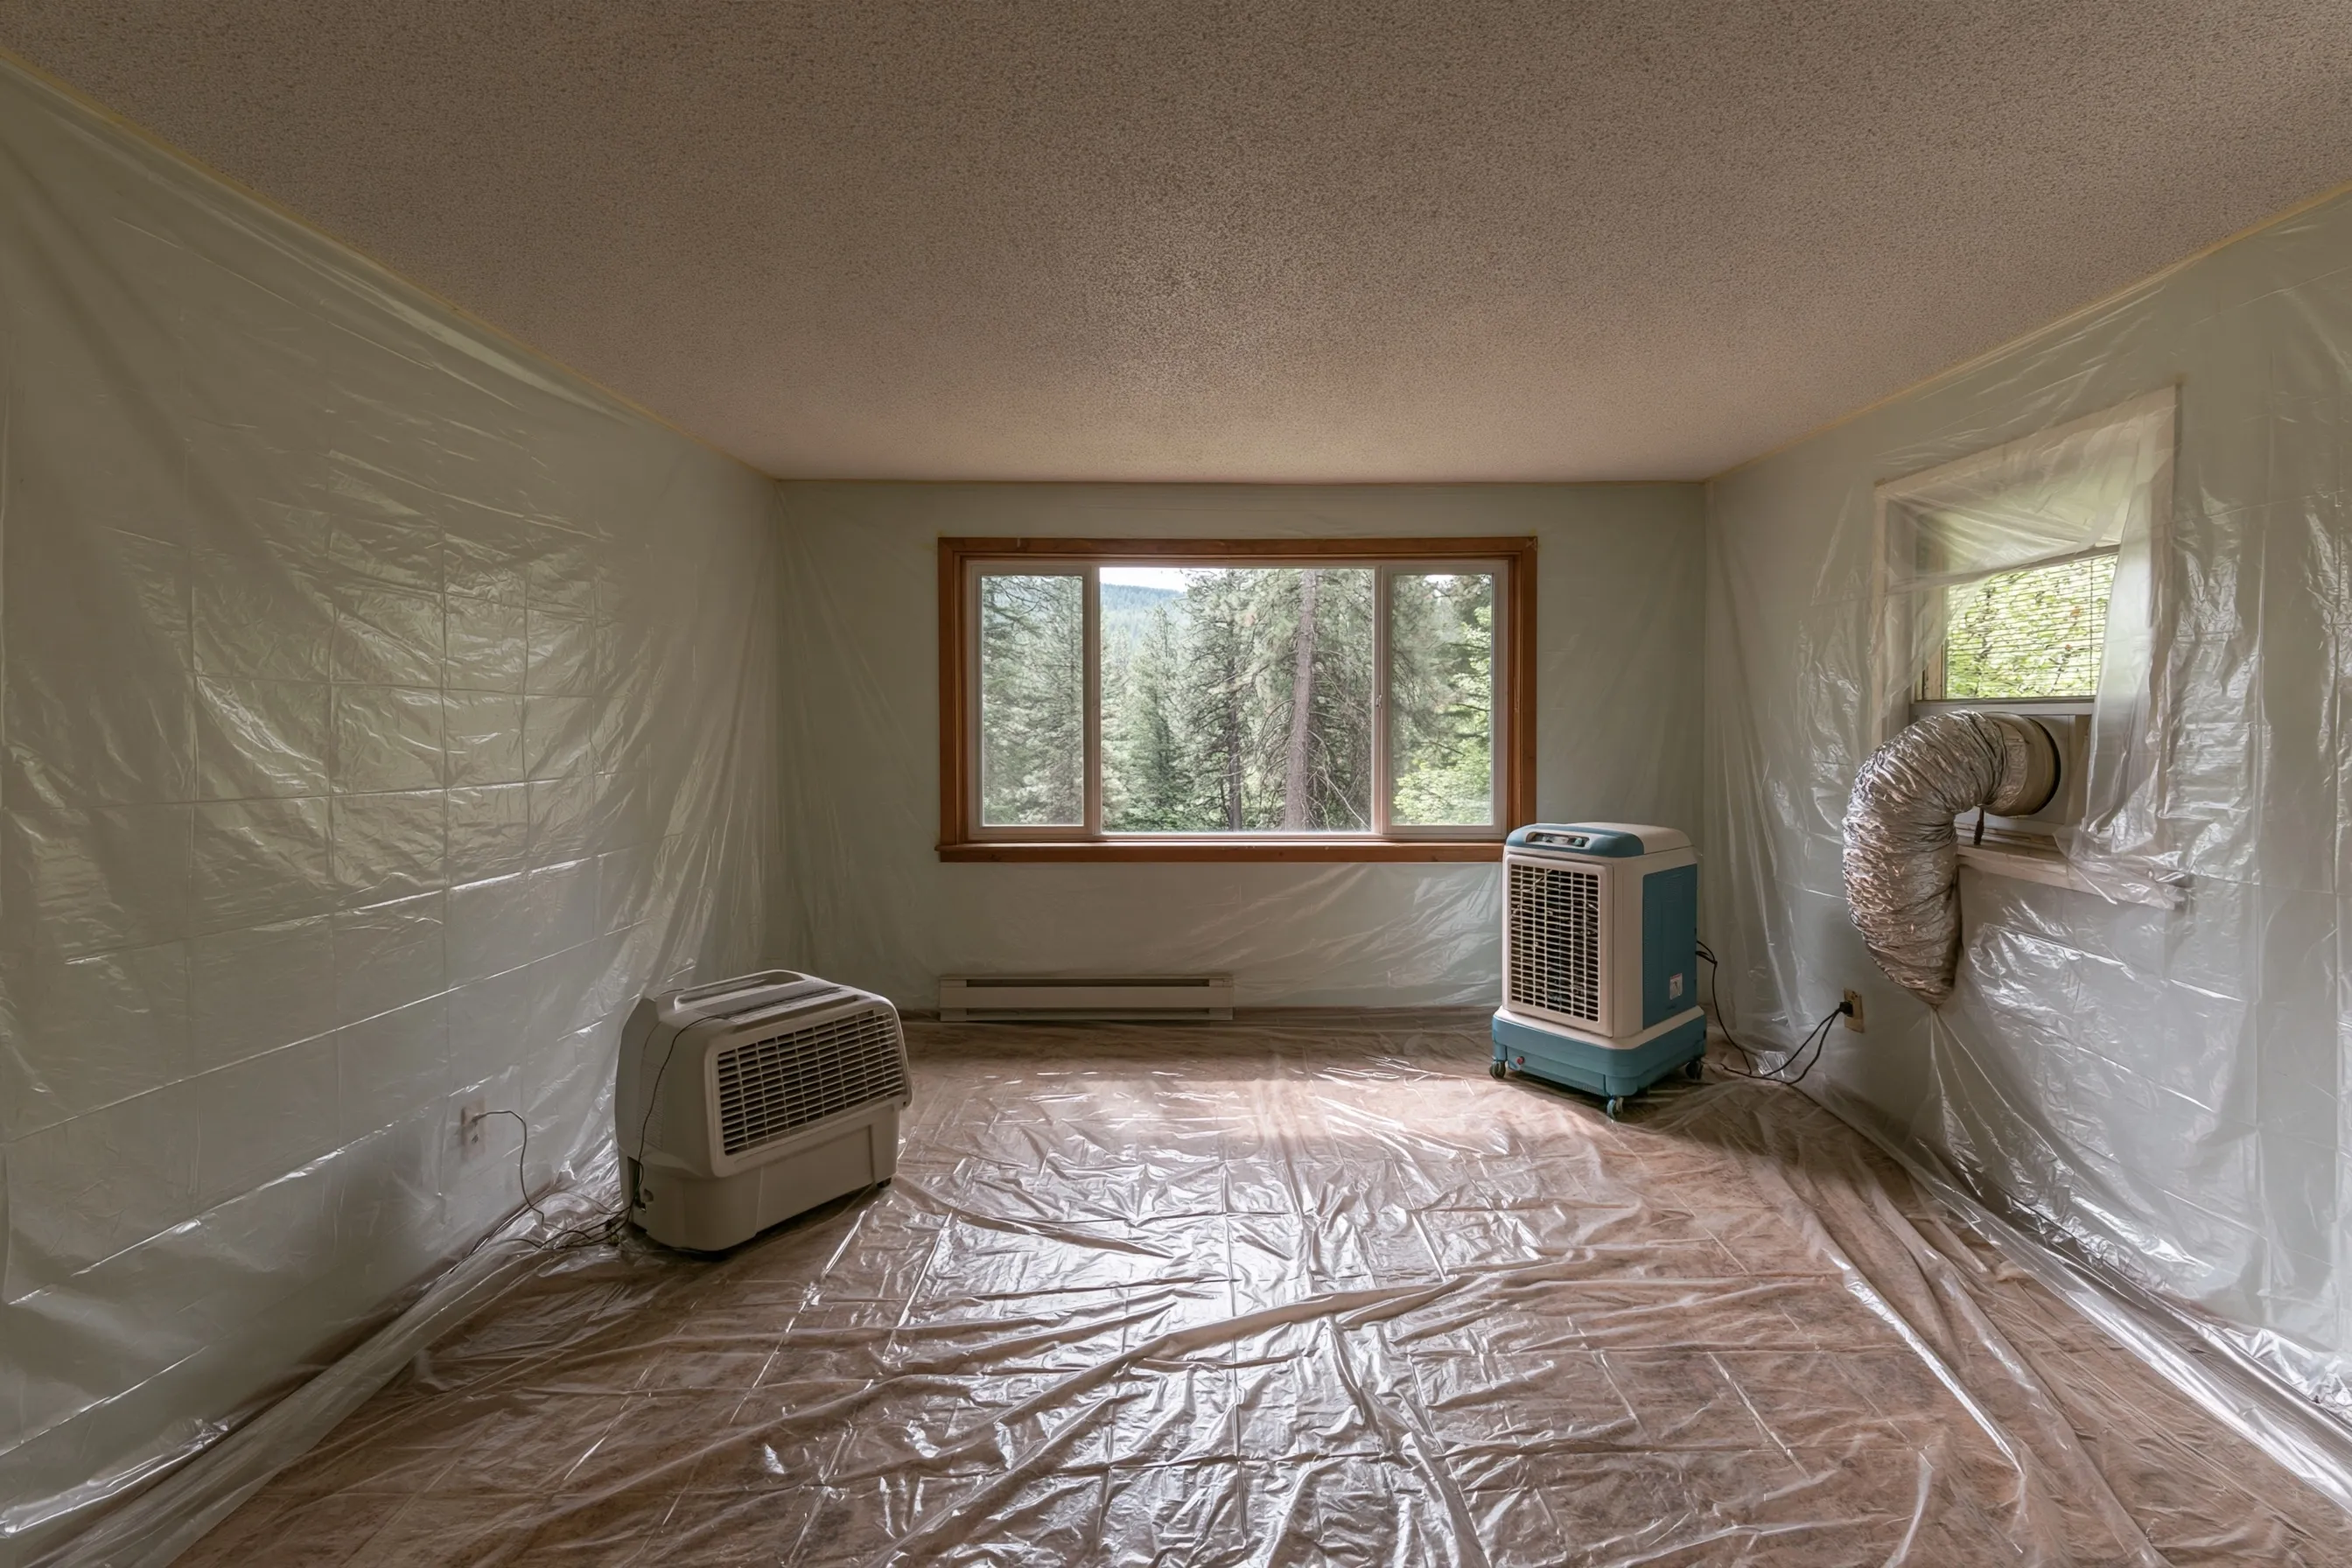
Popcorn ceilings removed one room at a time while the family stays home

Example project

One empty bedroom sealed in clear sheeting, a lumpy white ceiling above and a filter machine on the floor ducted out the window
Home
1960s rambler in Mukilteo
Original request
Smooth ceilings in the three bedrooms, the hall and the living room
Testing
Two rooms sampled, a bedroom and the living room; the lab finds asbestos in both
Area
About 700 sq ft of ceiling in five rooms
Work
One room sealed and finished at a time, with the family living in the rest of the house
Timeline
One filing for the whole house, then about six working days
Estimated cost
$7,600

Scope of work

One room at a time emptied, sealed in plastic with a filtered air unit at the window, the texture misted and scraped, bagged and cleaned before the next room is opened, and disposal. Smoothing and painting the five ceilings is a job for the finisher afterwards.

Project overview

In this example, a family in a 1960s rambler in Mukilteo wants smooth ceilings in the bedrooms, the hall and the living room, but has nowhere else to stay. Samples from a bedroom and from the living room both come back positive.

After the notice to Puget Sound Clean Air Agency, the crew works one room at a time. Each room is sealed, scraped, cleaned and checked before the plastic comes down and the next room starts, so the family always has places to sleep and live.

The goal

The goal is smooth-ready ceilings in five rooms, with the family at home the whole time and each room cleaned before the next.

Process

  1. Before work Texture sampled in two rooms; notice filed; furniture moving plan agreed.
  2. Days one to three One bedroom a day: sealed, scraped, cleaned and reopened.
  3. Day four The hall, with the bedroom doors sealed from the hall side.
  4. Days five and six The living room, the largest ceiling, then the final clean.

Planning right

  • Working room by room takes a few days longer than doing the whole house at once.
  • Keep children and pets out of the room being worked on and the path to it.
  • Move furniture from one room into the next finished room as the work goes.
  • Ask the painter to follow the same order, so each room is finished once.

Get a free quoteMore about asbestos popcorn ceiling removal

Vermiculite out of the middle of an attic before it becomes a bedroom

Example project

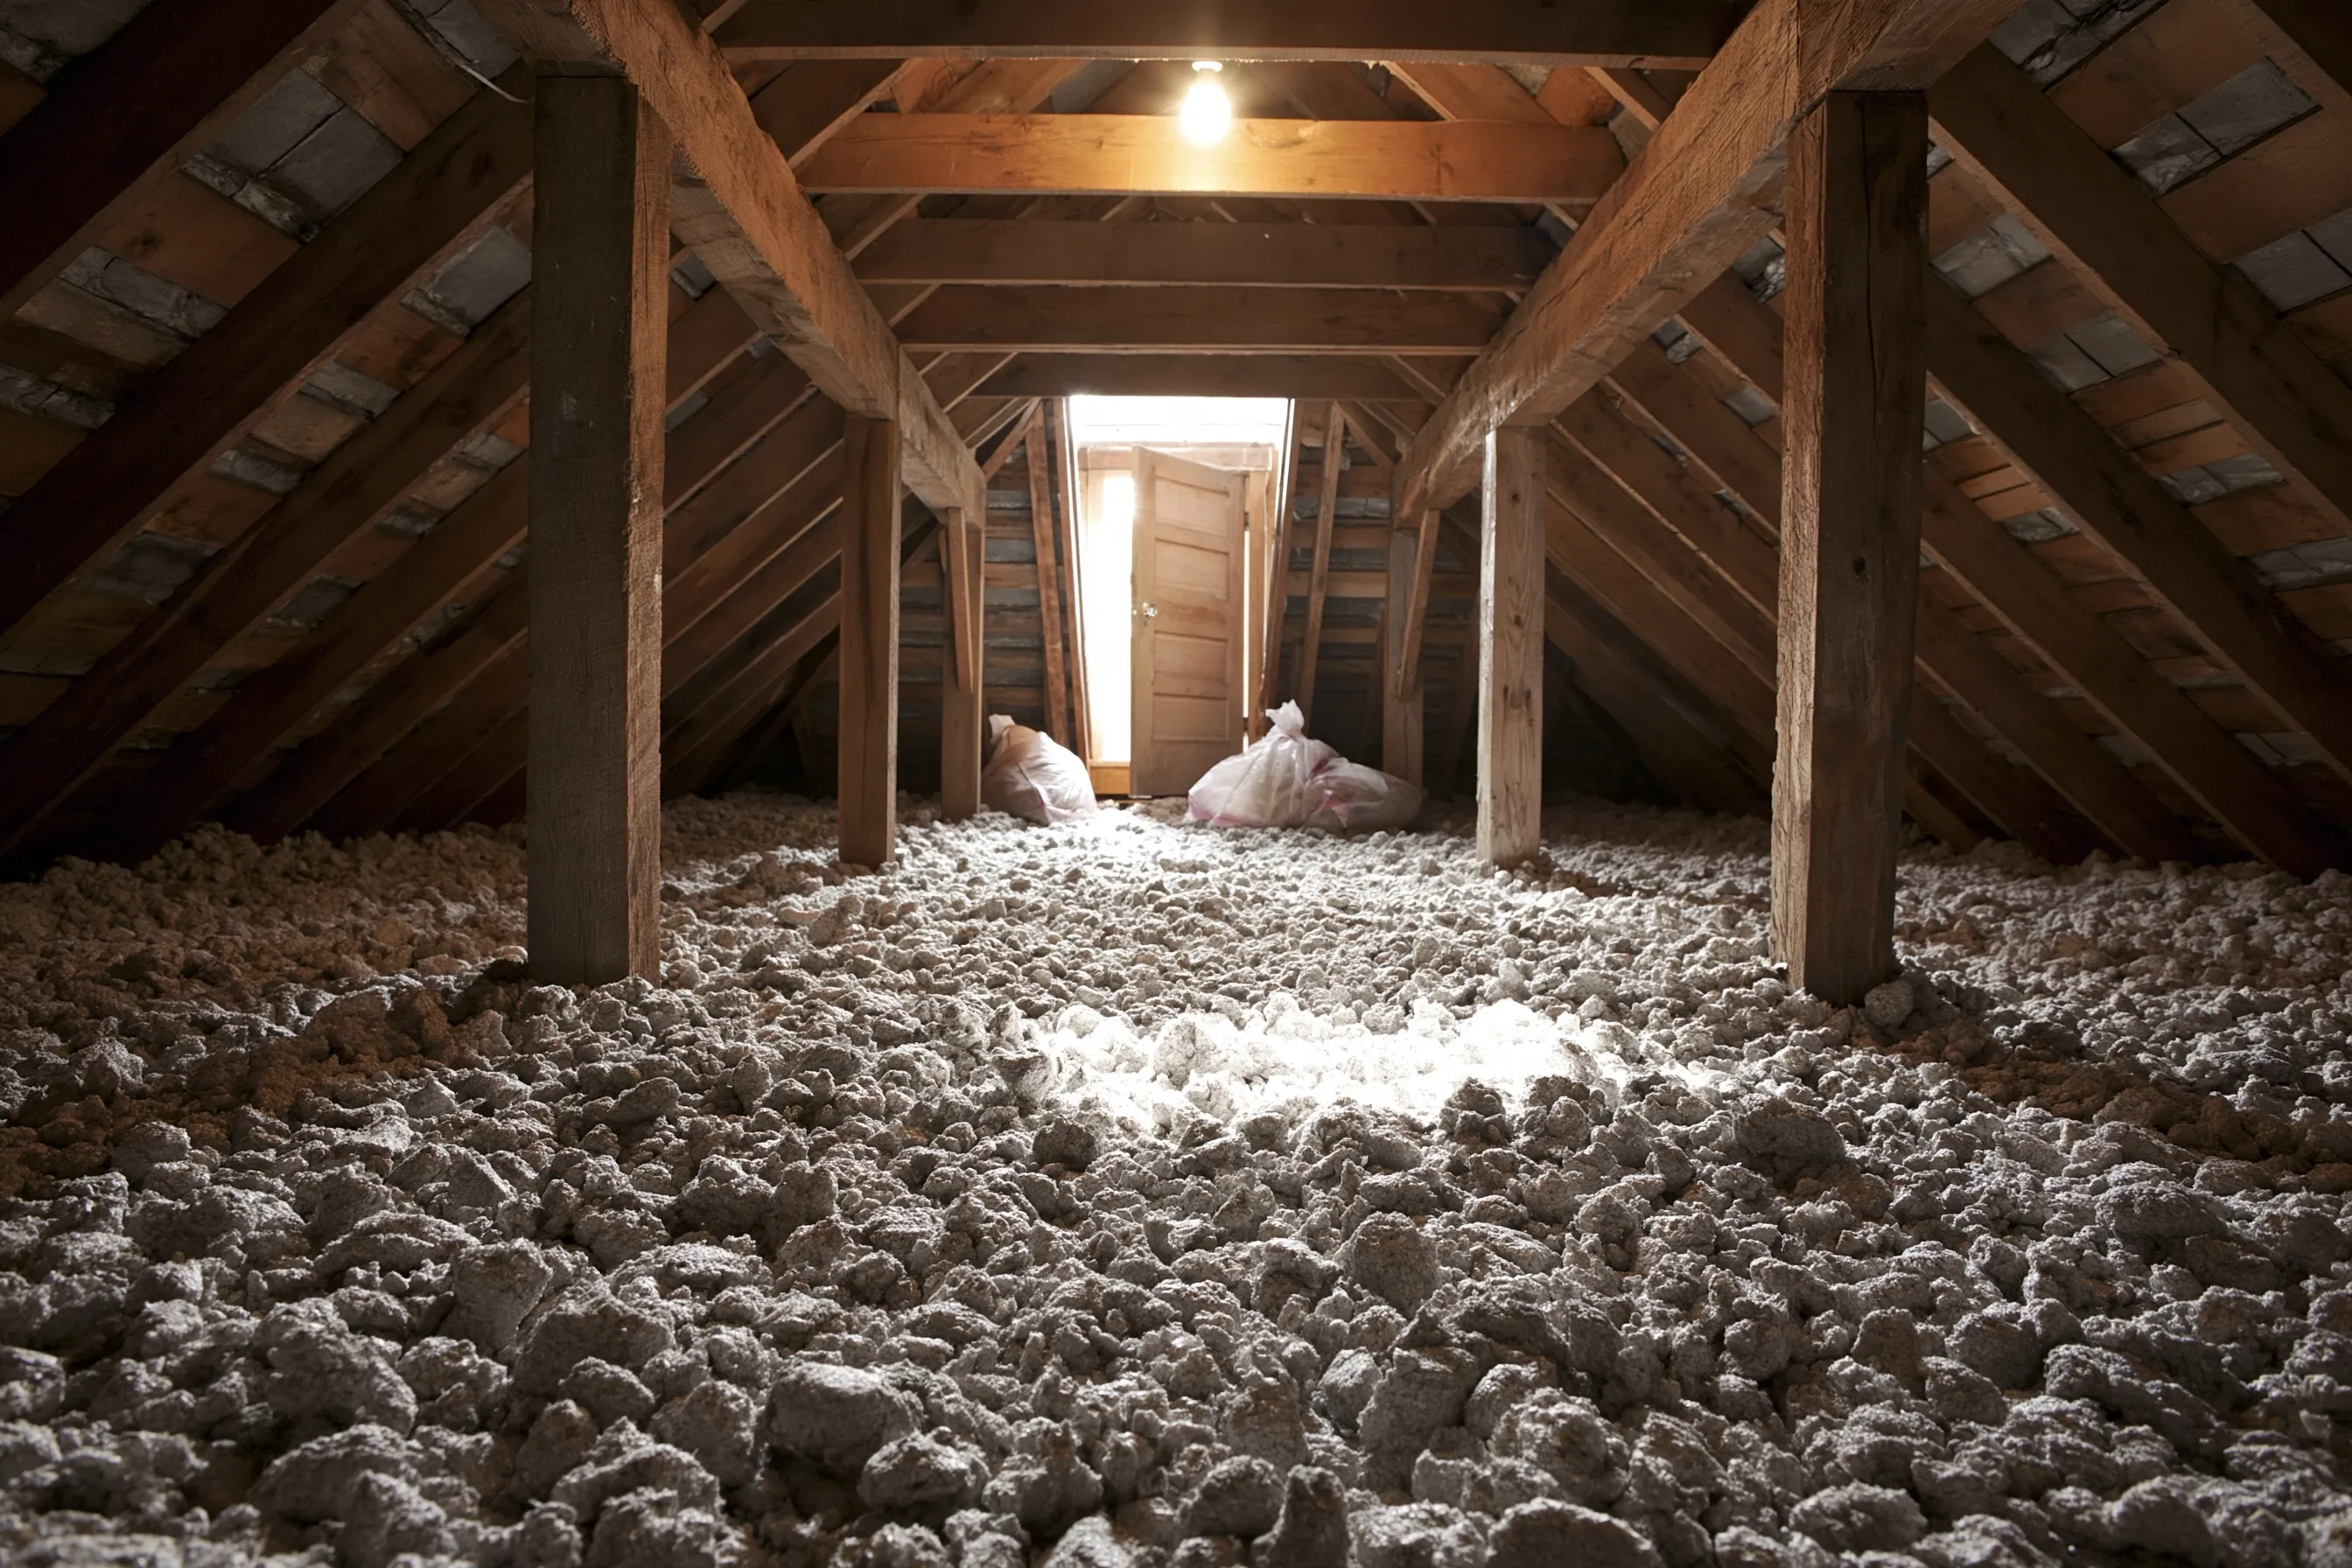
Bare wood rafters and plank sheathing over an attic floor filled with grainy gray insulation, lit from a small gable-end door
Home
1940s house with a steep roof in Everett, about 900 sq ft of attic floor
Original request
Turn the middle of the attic into a bedroom with a new stair, closing off the low sides
Testing
Fill from two bays, positive in both
Work
Vermiculite taken out of about 800 sq ft under the new bedroom floor and stair; the low side bays stay
Left in place
About 100 sq ft of fill at the low eave edges of the side bays, sealed behind new knee walls and listed in the house papers
Agency notice
Agency filing made before the hatch is opened for work
Timeline
Three days in the attic before the framers can cut in the stair
Estimated cost
$8,500

Scope of work

Every opening from the attic into the rooms below taped shut, negative air on the attic, the vermiculite under the bedroom floor and stair pulled out through a HEPA vacuum, the joists and plates there brushed down, the side bays covered and sealed, disposal and air samples. The knee walls, stair, framing and insulation belong to the remodel contract.

Project overview

In this example, the owners of a 1940s house in Everett want a bedroom in the middle of the steep-roofed attic. The new floor and stair mean the middle of the attic floor will be opened. Samples of the grainy fill come back positive.

Only the fill under the new floor and stair has to come out, about 800 sq ft, vacuumed into sealed bags under negative air. The low side bays stay closed behind the new knee walls, covered and sealed, and the owners keep a note of where they are. When the air test is clear, the framers can cut the stair opening.

The goal

The goal is a clean middle attic with an air test on file, ready to become a bedroom, and the side bays sealed off.

Process

  1. Before work Fill sampled; notice filed; ceiling lights below sealed; the bedroom area marked.
  2. Day one Hatch and vents sealed, filtered air unit running.
  3. Day two Fill vacuumed out of the bays under the new floor and stair; the side bays covered.
  4. Day three Joists brushed and vacuumed, air test, the area opened for the framers.

Planning right

  • Do not cut the stair opening until the attic is clean. Fill falls through any gap.
  • Ask the framers to make the knee walls tight, so nothing from the side bays reaches the bedroom.
  • Keep the house papers up to date with where the fill stayed, for a later buyer or remodeler.
  • Plan the new insulation with the framing, since the walls and roof will be open.

Get a free quoteMore about asbestos insulation removal

Asbestos removal timed with salvage before a teardown

Example project

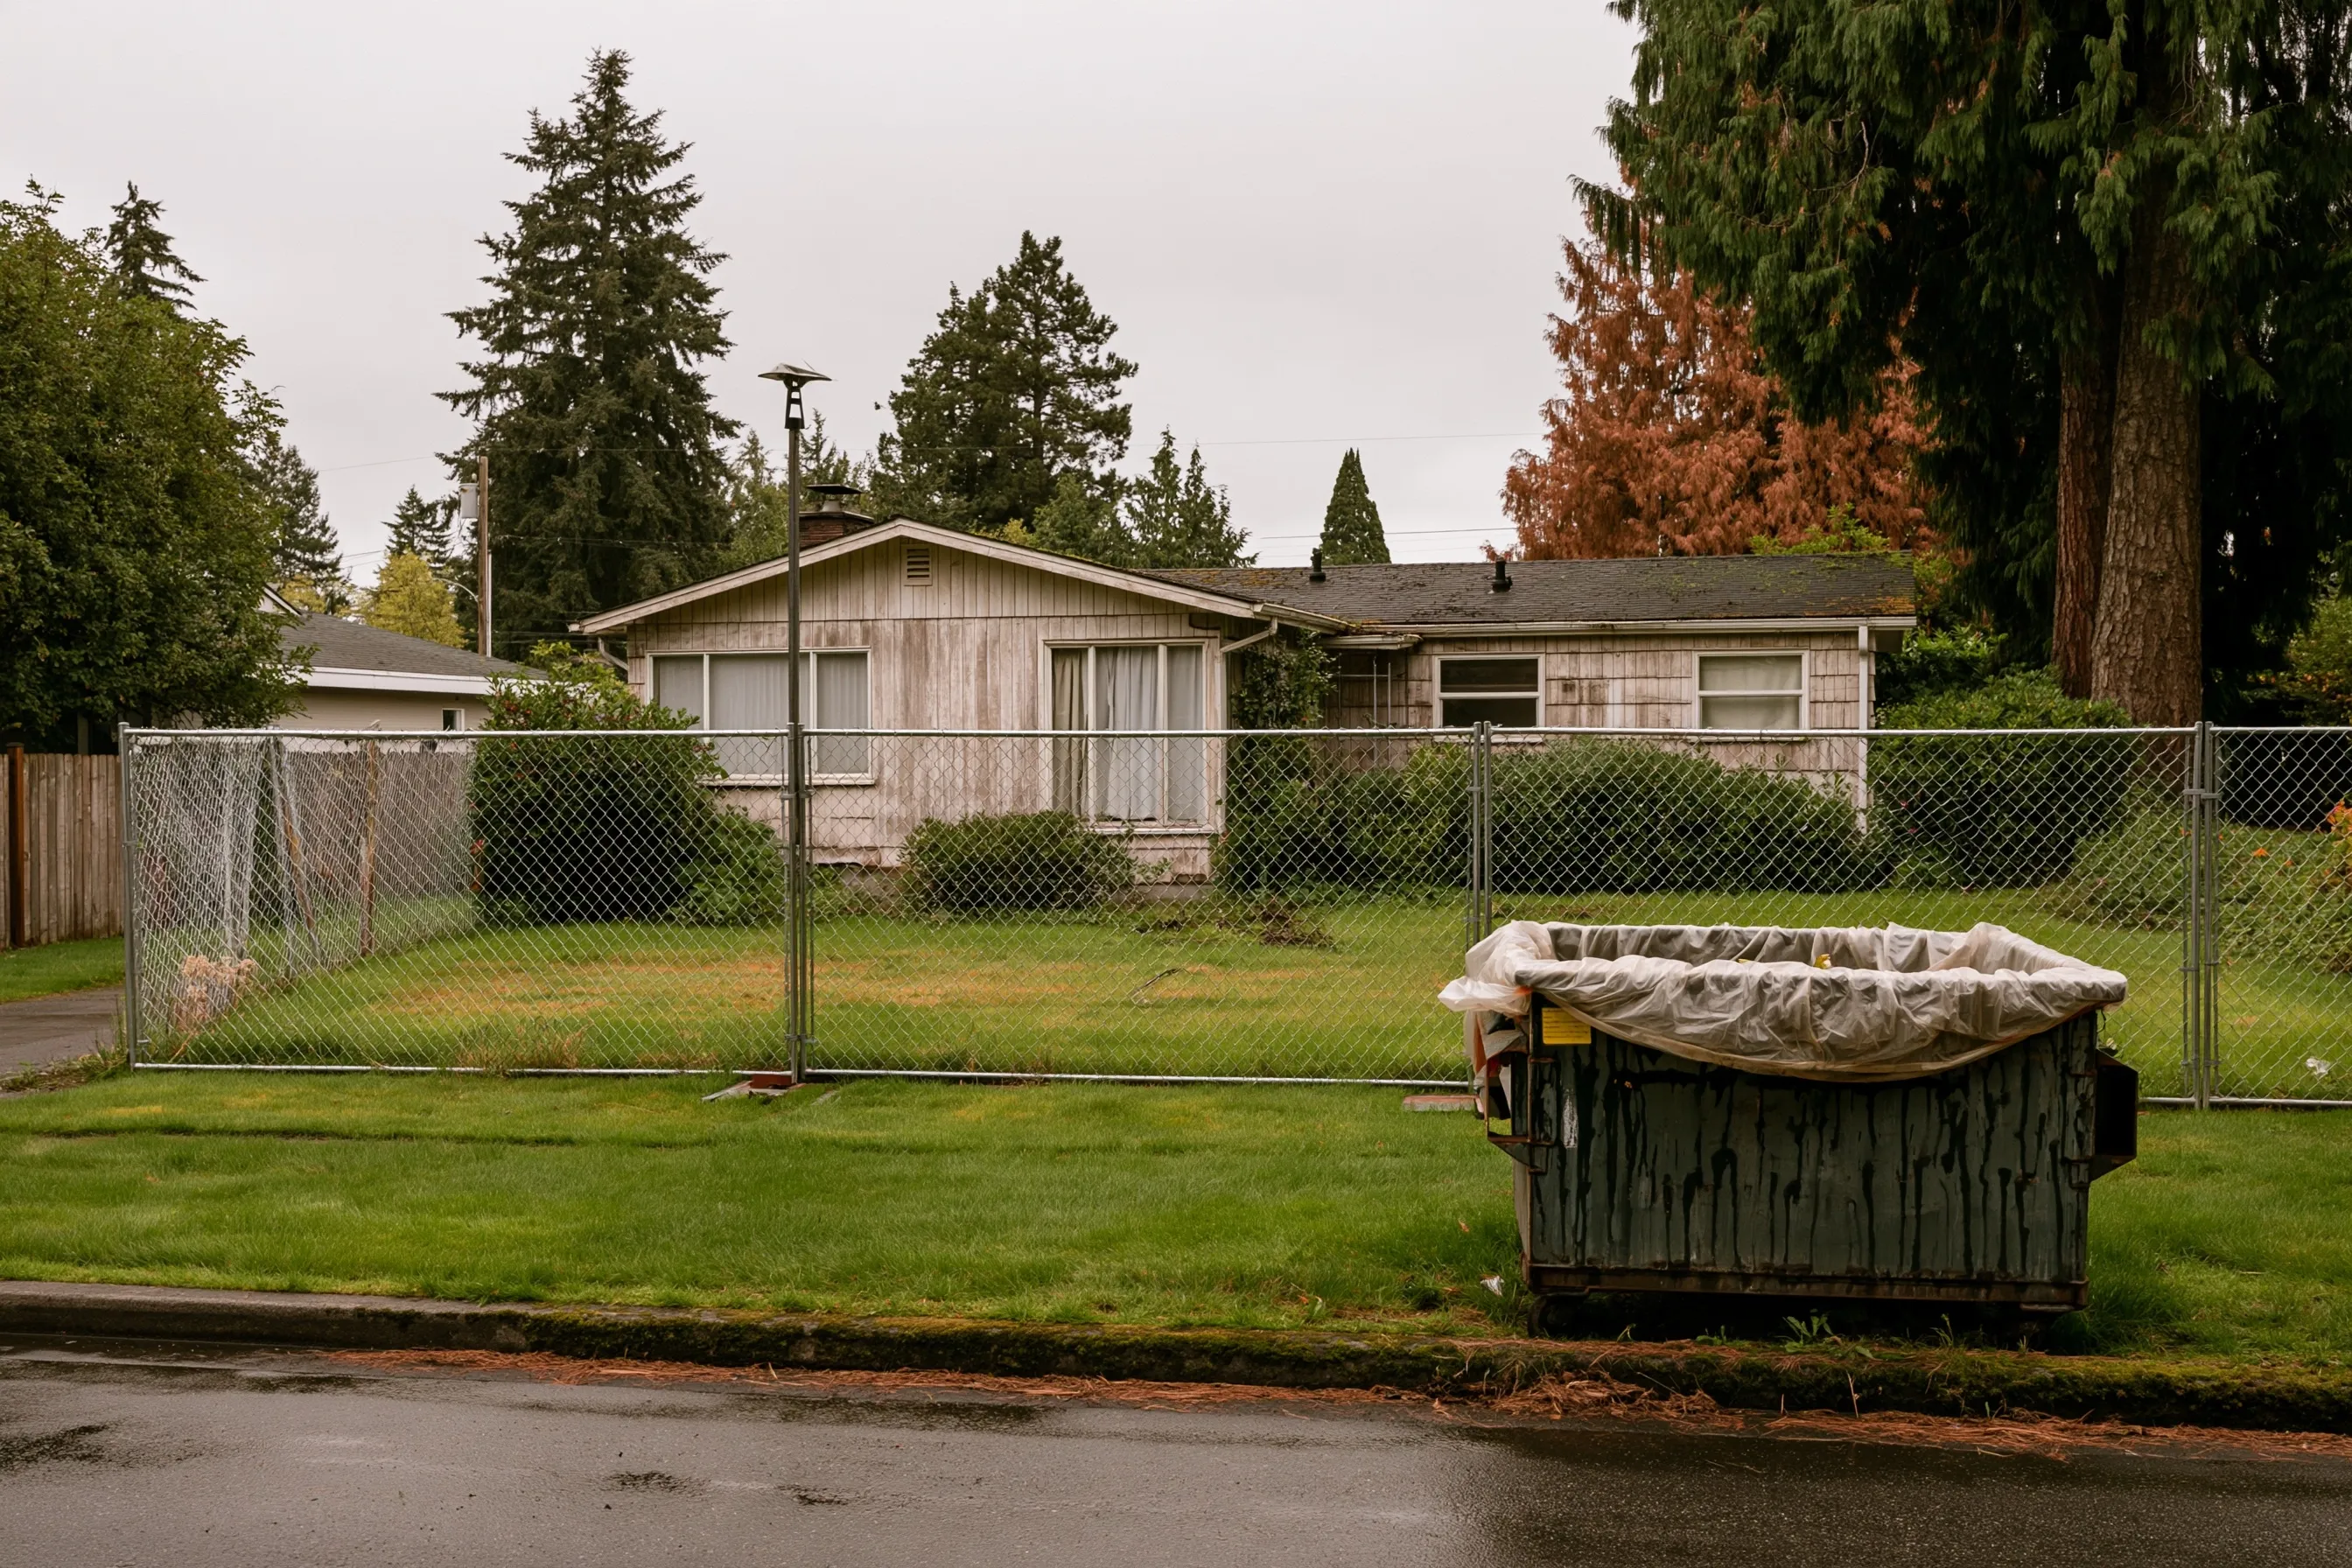
Empty one-story house from the 1950s fenced off with temporary chain-link, an overgrown lawn and a plastic-lined dumpster at the curb
Home
1950s rambler in Marysville, empty and fenced
Original request
Tear the house down for a new one, saving the wood floors and doors first
Testing
A full pre-demolition survey, attic to crawl space
Found
Asbestos in the ceiling texture, the kitchen and bath floor tile and the furnace duct wrap
Agency notice
Demolition notice with its 10-day wait, plus the asbestos notice
Timeline
Survey, about a week of removal, salvage, then demolition
Estimated cost
$18,500

Scope of work

Removal of the ceiling texture, floor tile and duct wrap inside sealed work areas, disposal outside the county, a HEPA clean and a final check, timed so the salvage crew can then take the floors and doors. Salvage and the wrecking crew are not in this figure.

Project overview

In this example, an empty 1950s rambler in Marysville is coming down so its owners can build a new house on the lot, and they want the oak floors and the old doors saved for reuse. A demolition survey finds asbestos in the ceiling texture, the 9-inch floor tile in the kitchen and bath, and the wrap on the furnace ducts.

The asbestos goes first, room by room, so the salvage crew works in clean rooms. The ceilings come down before the oak floors are lifted, which keeps texture off the wood. The demolition notice goes in with its 10-day wait, and the wrecking crew comes once the salvage is done.

The goal

The goal is a house cleared of asbestos in an order that saves the floors and doors, ready for demolition on schedule.

Process

  1. Weeks ahead Demolition survey; both notices filed with Puget Sound Clean Air Agency.
  2. Removal week Ceilings, then floor tile, then duct wrap, each in a sealed area.
  3. Final check HEPA clean and a visual check of every room.
  4. Then The salvage crew lifts the floors and doors; the house comes down after.

Planning right

  • Salvage and asbestos work need a set order. Ceilings come off before floors are lifted.
  • The demolition notice and its wait apply even if nothing tests positive.
  • The demolition permit file is the right home for the survey and every waste manifest.
  • Let the houses on either side know when trucks and crews will be there.

Get a free quoteMore about asbestos removal before a remodel or tear-down

Old floor tile out of a church fellowship hall

Example project

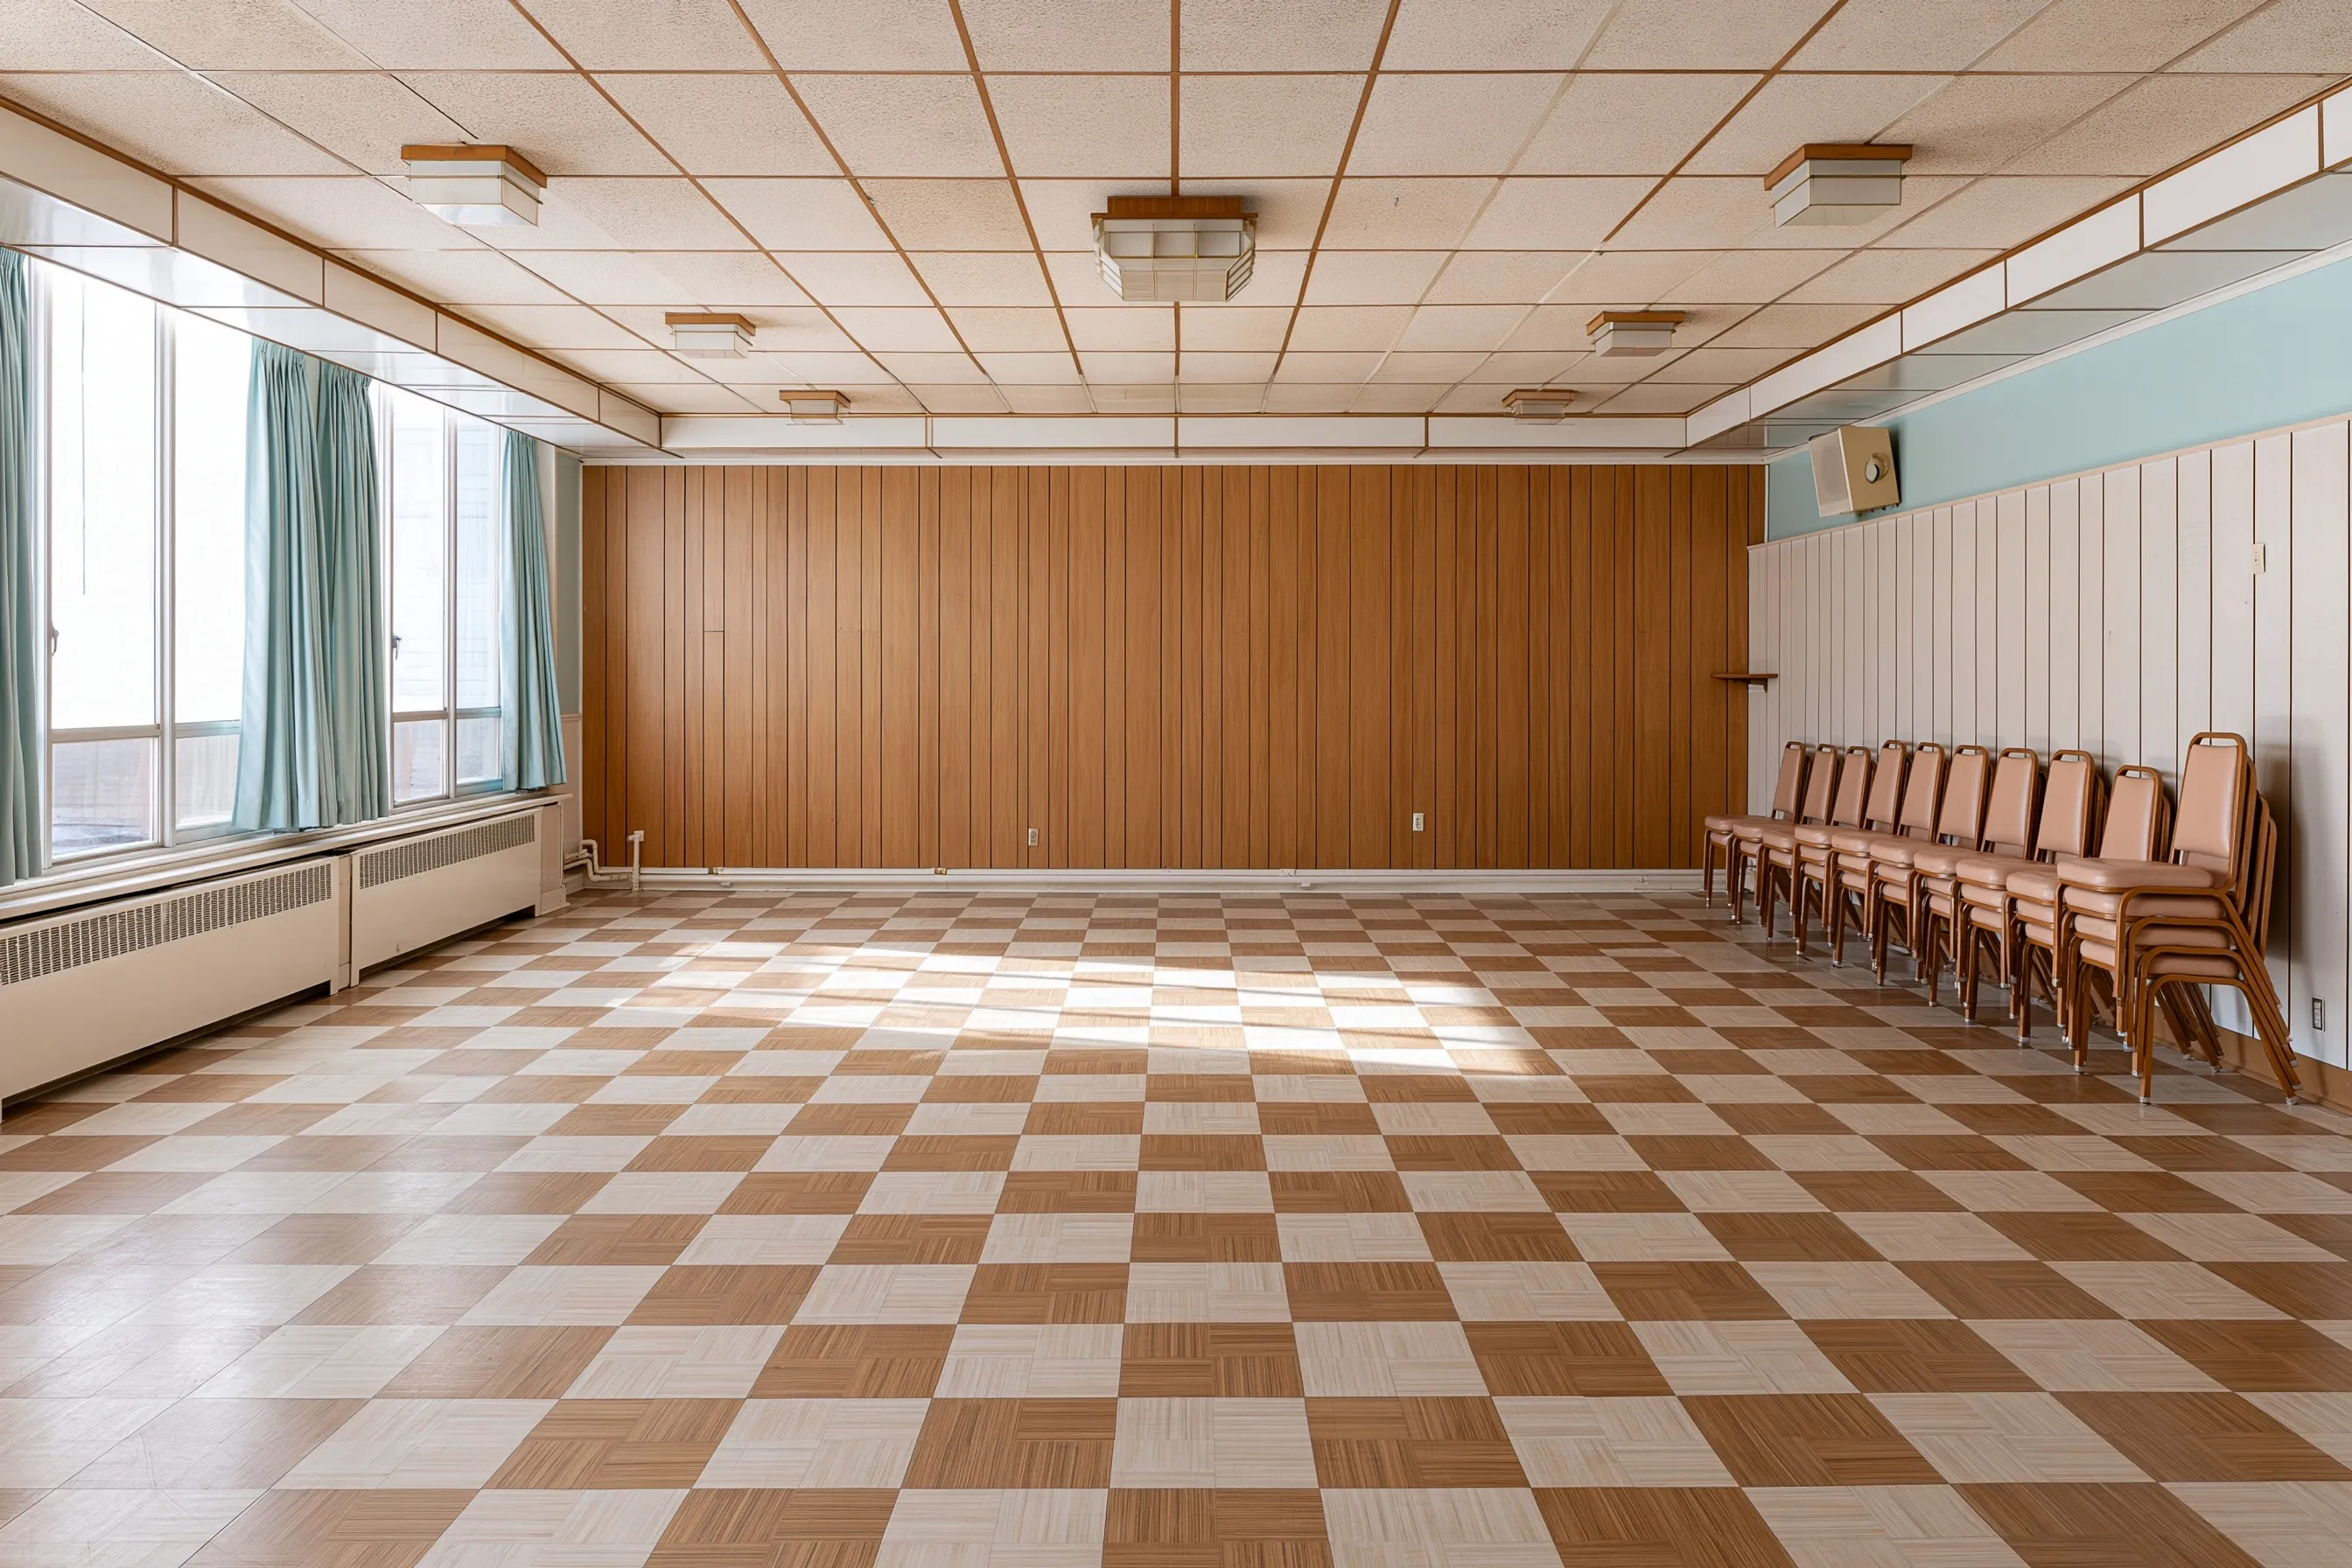
Large plain hall from the 1960s, a checkerboard tile floor, a lay-in tile ceiling, wood paneling and folding chairs piled along one wall
Building
1960s church fellowship hall in Everett, about 2,400 sq ft
Original request
A new floor in the hall before the winter programs start
Testing
The church’s survey shows the checkerboard tile and the black glue under it are both positive
Clear
The acoustic ceiling tiles
Setup
The hall sealed off from the kitchen and the hallway, the chairs and tables moved out
Timeline
Around six working days once the survey is back
Estimated cost
$21,000

Scope of work

A sealed work area with plastic over the doors and vents, the tile lifted wet and whole, the adhesive scraped, sealed bags, disposal, a HEPA clean and an air test before the hall is used again. Paying the inspector and buying the new hall floor are the church’s separate costs.

Project overview

In this example, a church wants a new floor in its 1960s fellowship hall before the winter programs. The survey finds asbestos in the checkerboard floor tile and the black adhesive, and none in the acoustic ceiling tiles.

The hall is closed off from the kitchen and the hallway, so the rest of the building stays in use. Whole tiles are soaked and pried up and the glue is scraped away, with no grinder in the building. The contractor checks with the agency about a notice, and the hall reopens only after its air samples pass.

The goal

The goal is a bare, clean hall floor ready for the new flooring, with the air test on file before the hall reopens.

Process

  1. Weeks ahead Survey and lab results; dates set around the church calendar.
  2. Day one Chairs and tables out, doors and vents sealed, air unit running.
  3. Days two to five Some 2,400 square feet of tile soaked and lifted, the glue scraped off section by section.
  4. Last day Floor vacuumed twice, air samples taken, and the flooring company gets the room.

Planning right

  • Plan the work between events. The hall is closed for about a week.
  • Kitchen and storage rooms off the hall may have the same tile. Have them sampled too.
  • Do not let anyone grind or sand the old adhesive to level the floor.
  • The church office should keep the survey, since the next project will need it.

Get a free quoteMore about commercial asbestos abatement

Old basement tile out before a basement apartment

Example project

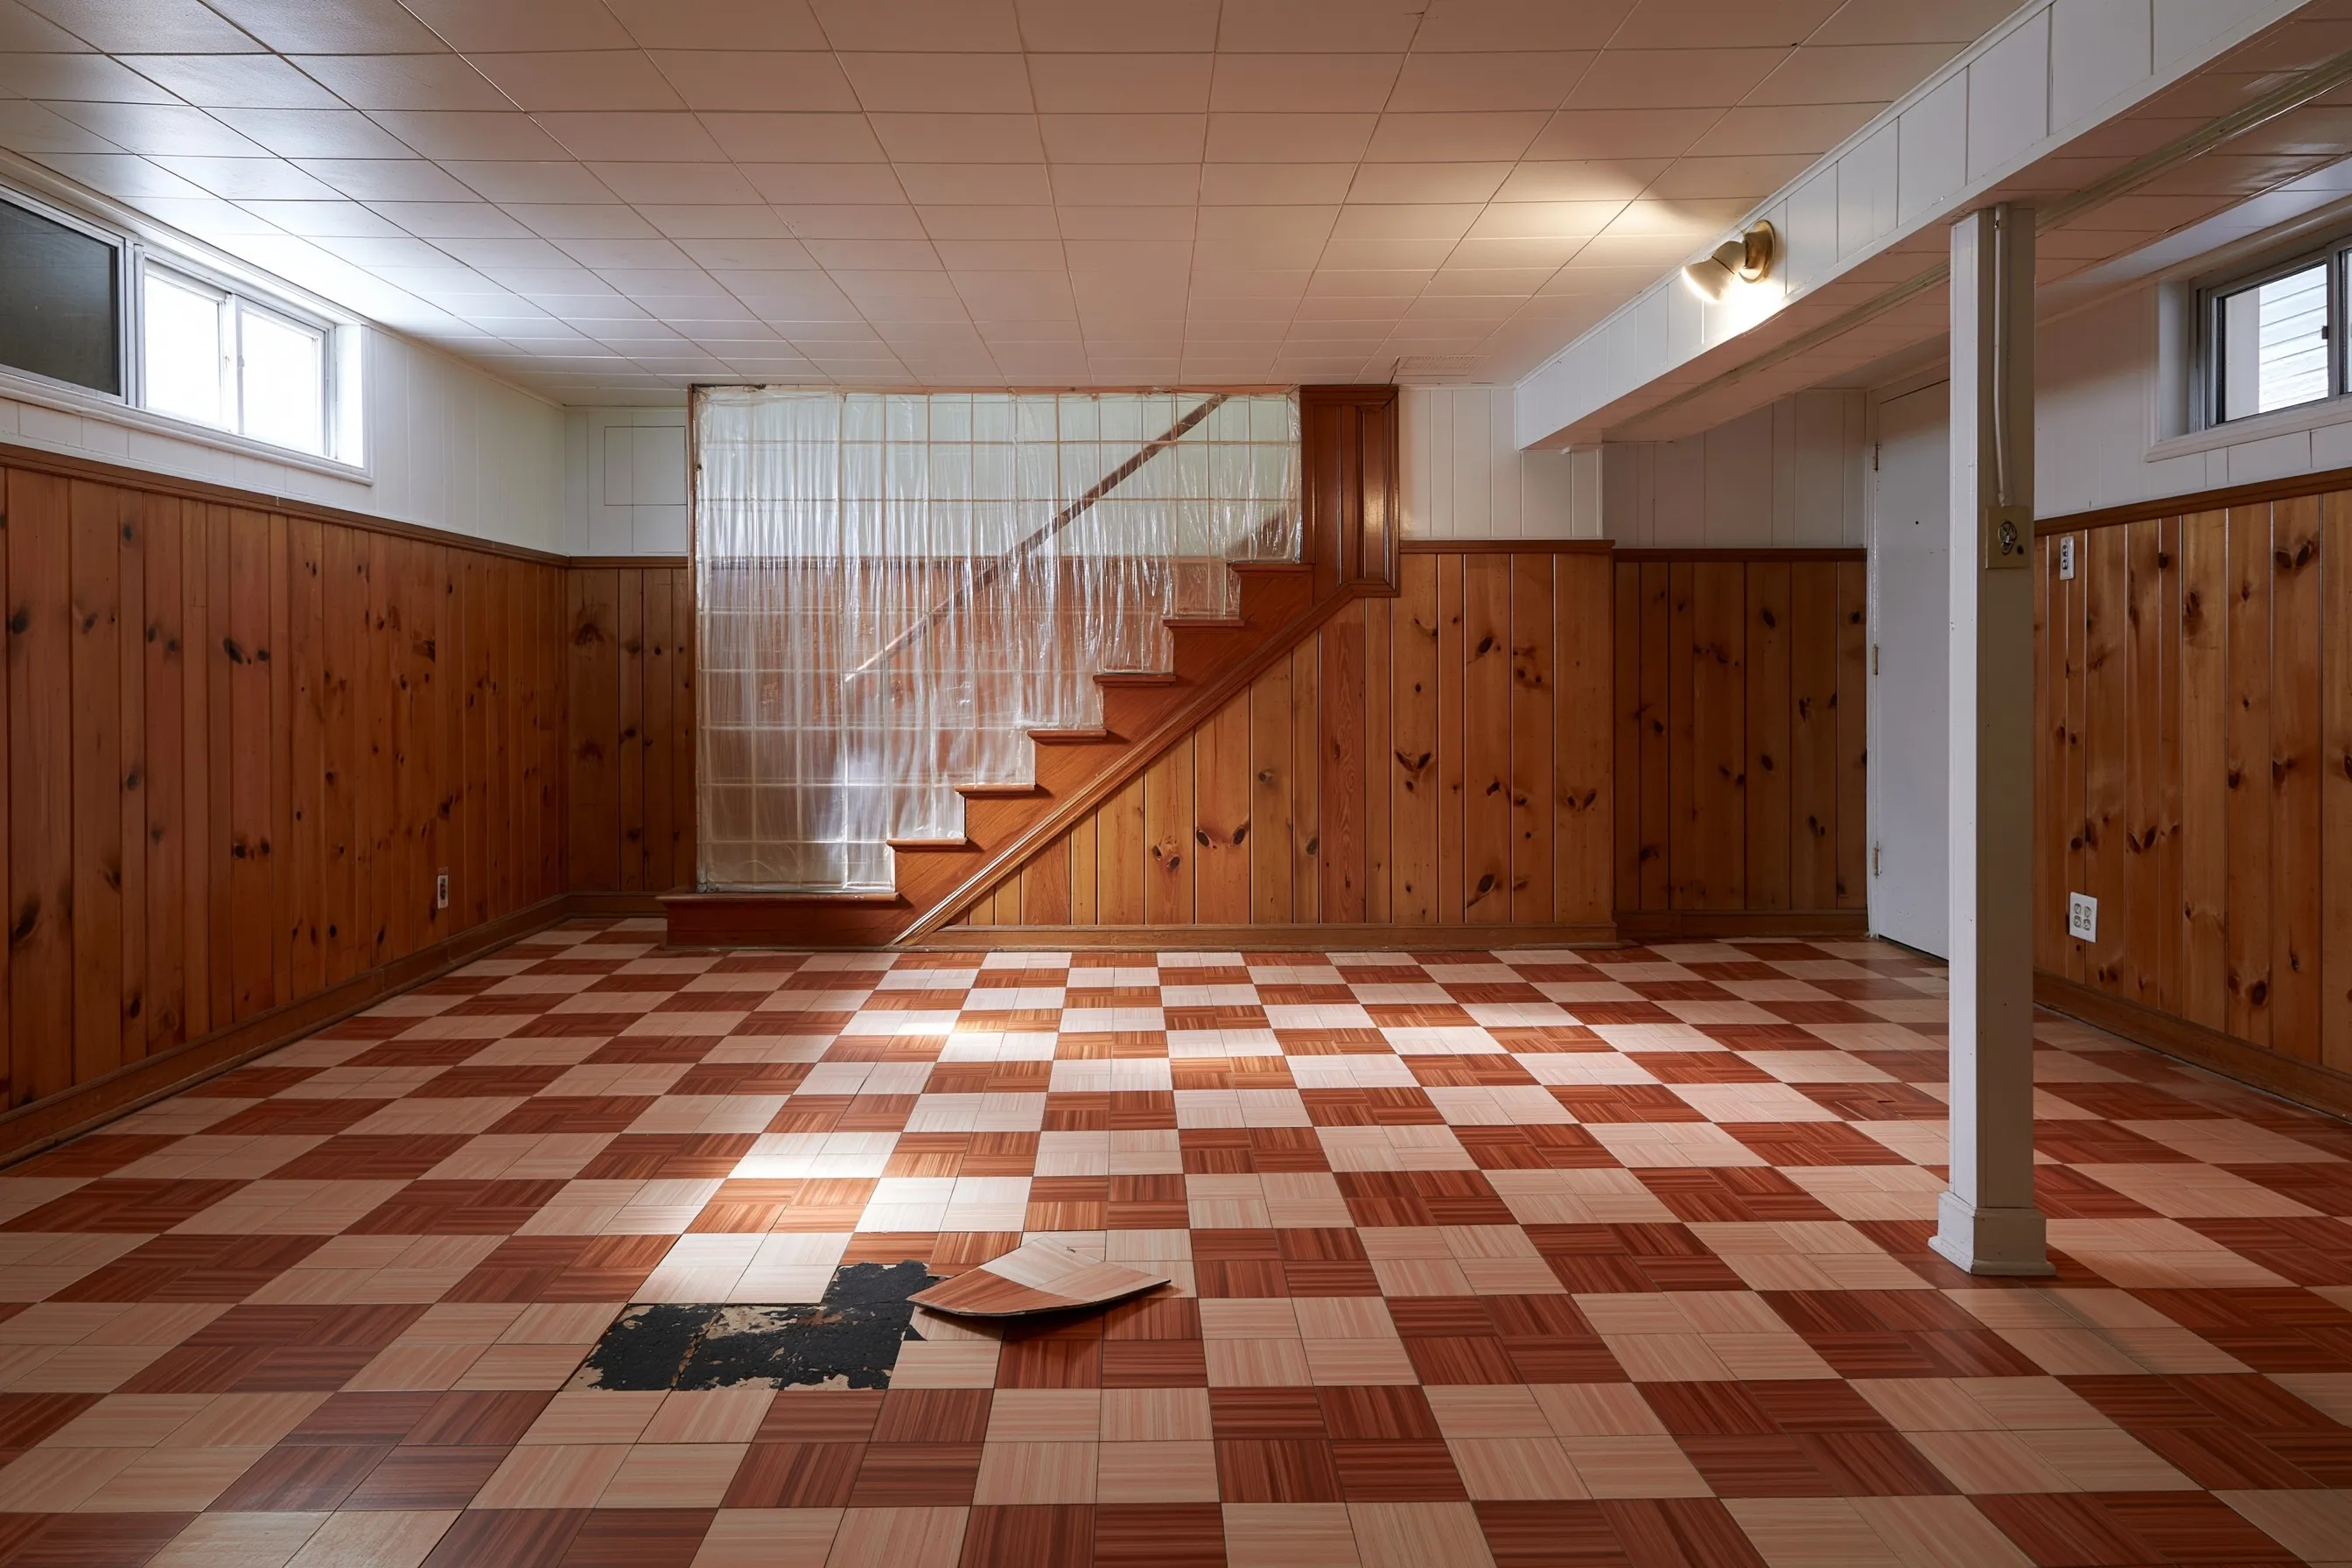
Old basement rec room with knotty pine walls and a red and cream checkerboard tile floor, one square pried up to show dark glue
Home
1950s house in Everett with a full basement
Original request
Turn the basement rec room into a rental apartment with a new floor
Testing
A loose checkerboard square and its glue, sent together and both positive
Area
About 600 sq ft of basement floor
Agency notice
None; squares that lift intact are nonfriable
Timeline
Two days on the floor before the apartment remodel
Estimated cost
$6,800

Scope of work

Plastic at the stairs and over the furnace area, the tile lifted wet and whole, the adhesive scraped off the slab, sealed bags, disposal and a HEPA clean of the bare concrete. Building the apartment and laying its floor are the remodeler’s contract.

Project overview

In this example, the owners of a 1950s house in Everett are turning the basement rec room into an apartment to rent out. The old checkerboard floor of 9-inch tile is coming loose in places, and the tile and the black adhesive under it both test positive.

The new floor needs a bare slab, so all of it comes up. Unbroken vinyl tile is not on the agency’s list for notices, yet the crew still soaks it before lifting and hand-scrapes the glue. A rental unit will need its own records, so the lab results and waste papers go in the owners’ file.

The goal

The goal is a bare, clean basement slab ready for the apartment floor, with the old tile gone in two days.

Process

  1. Before work Tile and adhesive samples to the lab; the basement emptied.
  2. Day one Plastic at the stairs, tiles lifted wet across the room, bagged.
  3. Day two The concrete scraped free of glue, then vacuumed and mopped until it shows clean.
  4. Then The remodeler starts on the new apartment.

Planning right

  • Loose tiles can be picked up whole and set aside in a bag. Do not break them.
  • Ask the remodeler to check the slab for moisture before the new floor goes down.
  • Keep the results with the rental records. Future work in a rental needs a survey.
  • A closet or a stair landing may hold a leftover patch of the same tile. Point it out before the crew starts.

Get a free quoteMore about asbestos floor tile and mastic removal

Request a free asbestos removal quote

Tell us which part of the building you plan to change, roughly how old it is, whether anything has been tested and the address. We'll get back to you soon with an estimate or any questions we have. Estimates are free and there's no obligation.

Call (425) 645-7667

Call (425) 645-7667